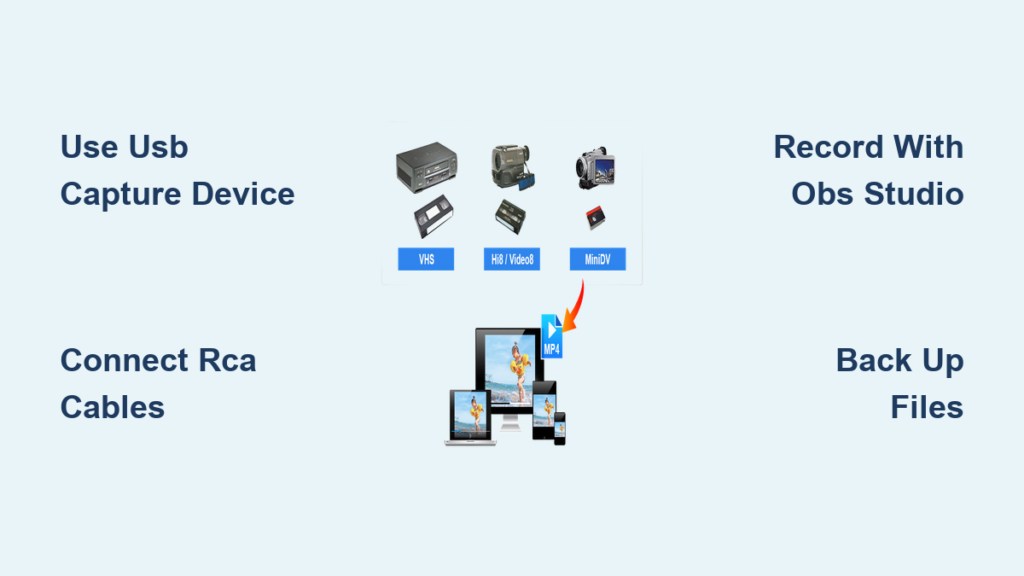
You’ve probably got old VHS tapes tucked away—home movies, birthdays, or family reunions—that are slowly degrading with time. The best way to transfer VHS to computer is using a USB video capture device and free software like OBS Studio to convert analog tapes into digital MP4 files. Since VHS is analog and computers are digital, you need a hardware bridge to record the playback in real time. The good news? You can do it for under $15 with plug-and-play tools that work on both Mac and PC. This guide walks you through every step: choosing the right gear, connecting your VCR, capturing high-quality video, and safely backing up your memories.
You’ll learn how to avoid common audio and video issues, estimate storage needs, and decide whether DIY is right for your collection. Whether you’re preserving a wedding tape or digitizing decades of home videos, this method ensures your analog past lives on in digital form.
Choose the Right VHS Capture Device
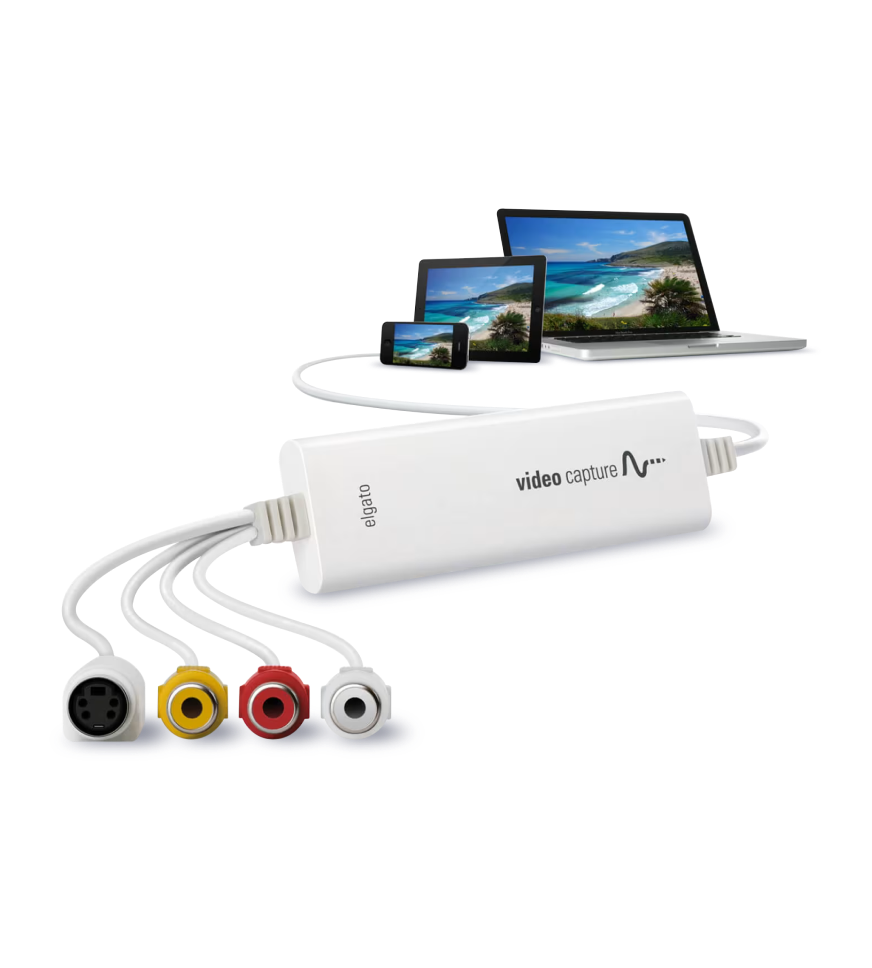
Use a Budget USB 2.0 Video Grabber
For most users, a USB 2.0 video grabber under $15 is the best starting point. These devices connect your VCR to your computer via USB-A and accept RCA cables for video and audio input. They’re plug-and-play on modern Windows and macOS systems—no drivers needed. If your computer has only USB-C ports (like newer MacBooks), use a USB-A to USB-C adapter to maintain compatibility.
Upgrade to Elgato Video Capture for Reliability
If you want a smoother experience, the Elgato Video Capture (~$80) offers better build quality and includes user-friendly software. It supports both Mac and PC, delivers stable performance, and simplifies recording with one-click controls. While more expensive, it’s ideal for users who prefer polished software over free tools like OBS.
Use S-Video for Sharper Picture Quality
If your VCR has S-Video output, use it instead of RCA. S-Video separates color and brightness signals, reducing color bleed and delivering a cleaner image. Not all capture devices support S-Video, so check compatibility before buying. When available, it’s the best way to maximize the visual quality of your digitized tapes.
Set Up Your VCR for Digital Transfer

Test Your VCR Before Recording
Before digitizing, test your VCR with a tape. Confirm it plays smoothly, ejects properly, and outputs video and audio. Older machines may need head cleaning or maintenance. A malfunctioning VCR can cause glitches, dropouts, or failed recordings—don’t risk losing content due to hardware failure.
Identify Your VCR’s Output Ports
Your VCR must have analog output ports:
– Yellow RCA for composite video
– White and red RCA for stereo audio (or just white for mono)
If your VCR only outputs mono audio, use a mono-to-stereo splitter (under $5) to duplicate the signal to both left and right channels. Without it, audio will play in only one ear.
Pick a High-Quality VCR for Best Results
For optimal playback, use a VCR from the late ’90s or early 2000s with S-Video and stereo audio outputs. Models from Panasonic, Sony, or JVC are known for reliability. If you’re buying a VCR specifically for digitization, prioritize one with strong reviews for playback stability and clean signal output.
Connect Your Hardware Correctly
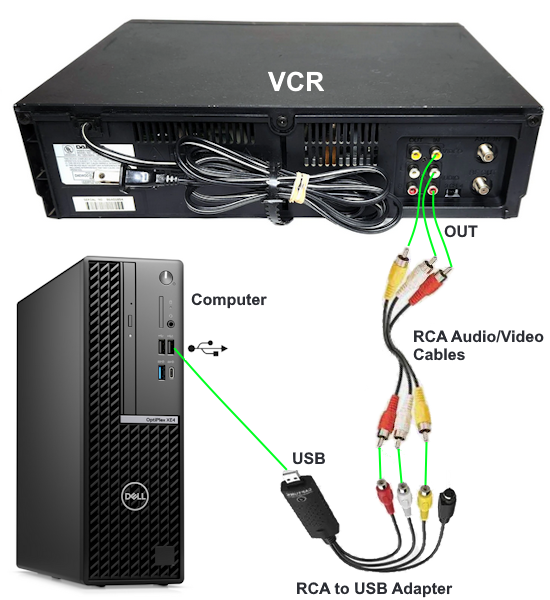
Wire the VCR to the Capture Device
- Connect RCA cables from your VCR’s out ports to the capture device’s in ports:
• Yellow → Video
• White → Left Audio
• Red → Right Audio - Plug the USB end of the capture device into your computer (use a USB-C adapter if needed)
Keep the signal path direct: VCR → Capture Device → Computer. Avoid daisy-chaining devices to prevent signal loss.
Add a Mono-to-Stereo Splitter If Needed
If your VCR has only one white audio output (mono), use a 3.5mm mono-to-stereo splitter or RCA Y-adapter. This duplicates the audio signal to both channels, ensuring balanced sound in your final recording. Without it, you’ll get audio in only one ear—a common but easily fixable issue.
Install and Configure the Right Software
Use OBS Studio for Free, High-Quality Capture
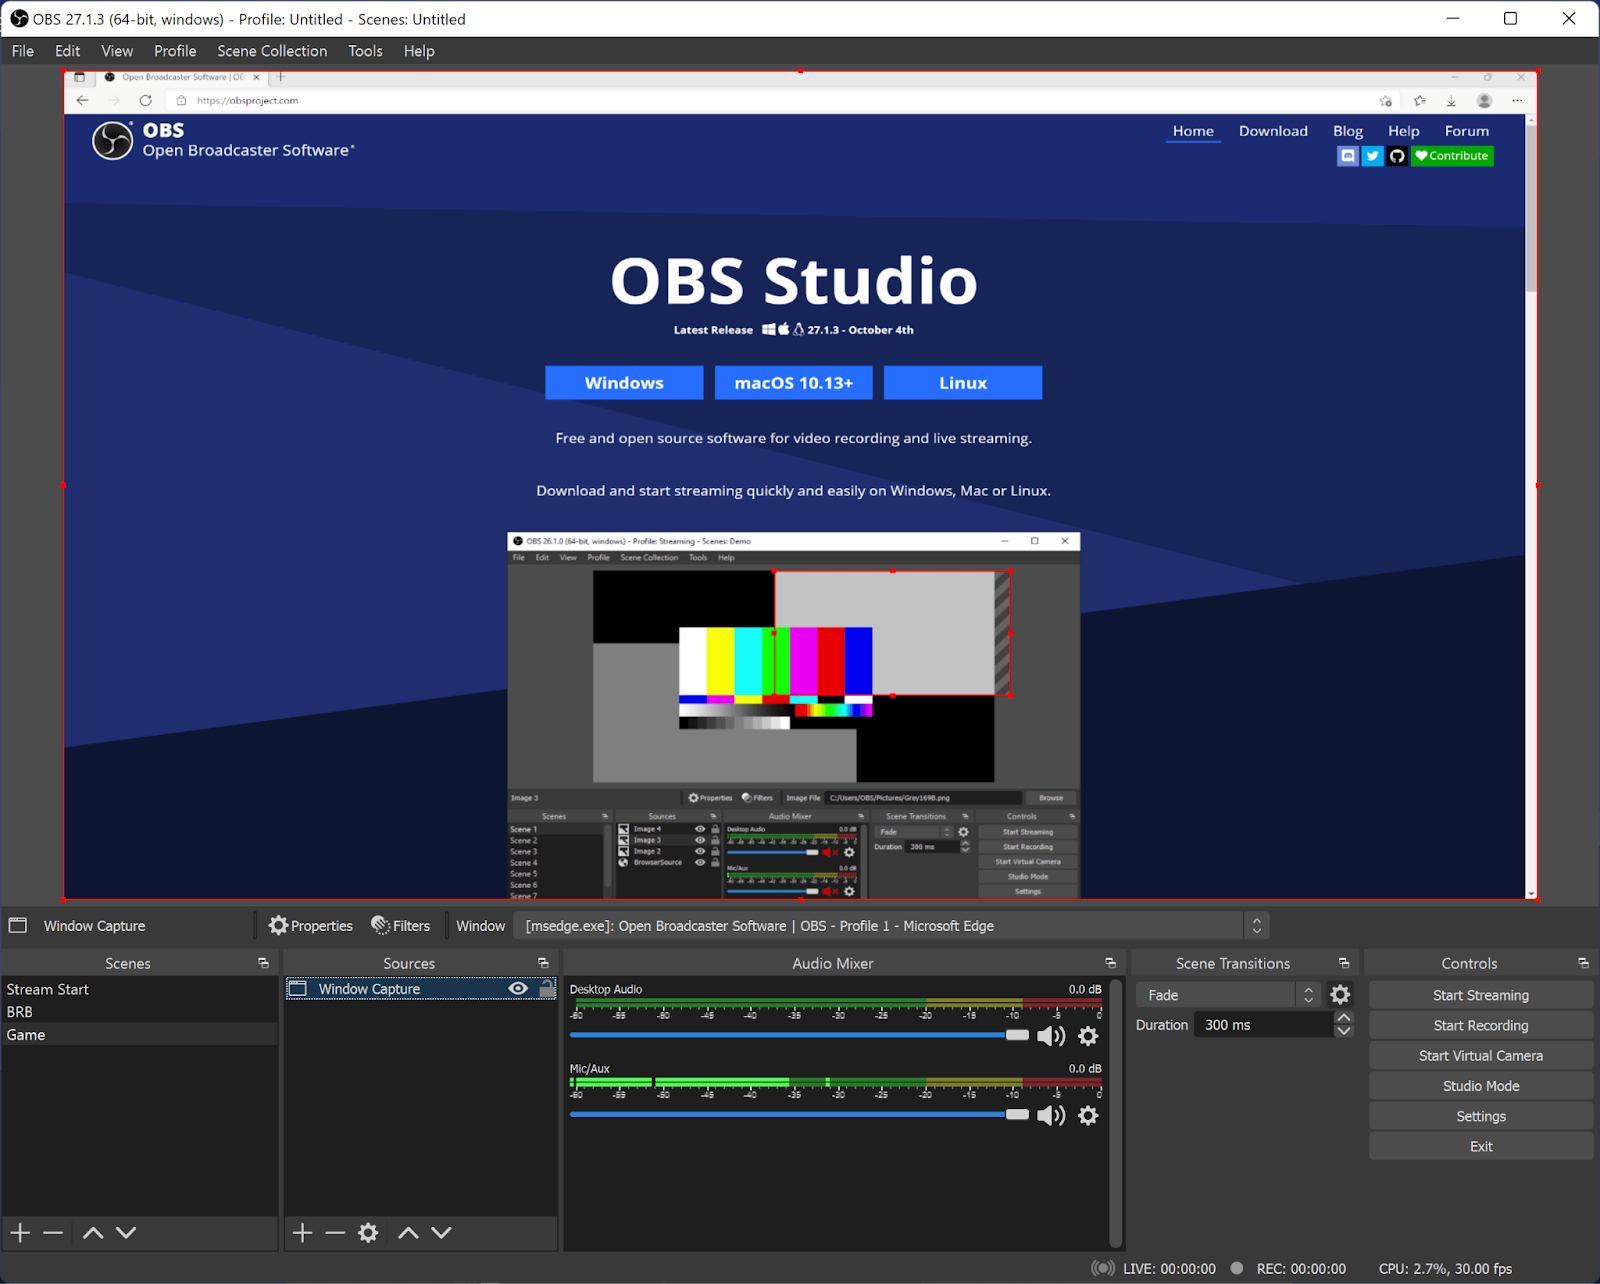
OBS Studio is the top free choice for both Mac and PC. It’s powerful, reliable, and handles real-time recording with minimal setup. Here’s how to configure it:
- Download and install OBS Studio from obsproject.com
- Open Settings > Video:
• Set Base Canvas Resolution to640x480
• Set Output (Scaled) Resolution to640x480 - Go to Sources and click +:
• Add Video Capture Device
• SelectUSB Videoas the device
• Set resolution to640x480 (Custom) - Add Audio Input Capture:
• SelectUSB Digital AudioorUSB Audio
Why 640×480? That’s the native resolution of VHS. Capturing at this size avoids scaling artifacts and keeps file sizes manageable.
Use Elgato or Dazzle Software If Included
If you’re using Elgato or Dazzle hardware, install the included software. These apps auto-detect your device, let you preview video, and offer one-click recording. You can name files, trim footage, and export directly—ideal for users who want a simpler workflow.
Avoid VLC for Long Recordings
While VLC Media Player can capture video, it’s unreliable for multi-hour sessions. It may drop frames or crash unexpectedly. Stick with OBS or dedicated capture software for full-tape transfers.
Start the Real-Time Recording Process
Do a Test Run Before Full Capture
Before recording an entire tape, capture a 1–2 minute test clip. Check:
• Is video displaying correctly?
• Is audio balanced in both channels?
• Are colors and brightness acceptable?
This prevents wasted time and storage if something’s misconnected.
Begin Full-Length Digitization
- Insert the VHS tape and press Play on the VCR
- In OBS or your software, click Start Recording
- Let the tape play to the end—recording happens in real time
- Click Stop Recording when finished
Expect to spend one hour per hour of tape. There’s no faster way—this is analog-to-digital conversion at real-time speed.
Name and Save Files Properly
Use descriptive names like Dad_Birthday_1995.mp4 or Christmas_2002.avi. Save files to an external hard drive if digitizing multiple tapes—each hour takes about 750 MB of space at high quality.
Handle Post-Capture Steps
Trim and Edit for Cleaner Results
Use free tools like DaVinci Resolve or Shotcut to:
• Trim blank sections at the start and end
• Adjust audio levels
• Fix color or brightness
• Add titles or transitions
Editing is optional. Many users keep raw captures for archival and create edited versions for sharing.
Back Up Your Digital Files Immediately
Protect your memories:
• Save copies on two external drives
• Upload to cloud storage (Google Drive, Dropbox, OneDrive)
• Consider a NAS (Network Attached Storage) for long-term backup
Never rely on a single copy. Hard drives fail—backups are essential.
Share Your Digitized Videos
Once saved, you can:
• Email short clips to family
• Upload to YouTube (set to private if desired)
• Transfer to iPad, phone, or smart TV
• Burn to DVD for physical gifts (though digital is more durable)
Troubleshoot Common VHS Transfer Issues
Fix No Video or Black Screen
• Check connections: Ensure RCA cables are firmly plugged into out ports on VCR and in on capture device
• Restart OBS: The device may not be detected on first launch
• Try another USB port: Some ports deliver better power or data flow
Fix Audio Only on One Side
• Cause: Mono output not duplicated
• Fix: Use a mono-to-stereo splitter or in editing software, duplicate the mono track to both channels
Fix Lag or Dropped Frames
• Upgrade your computer: Video capture is CPU-intensive
• Close other apps: Free up memory and processing power
• Use a wired connection: Avoid Wi-Fi-heavy tasks during recording
Improve Poor Video Quality
• Clean the VCR heads: Dirty heads cause fuzzy playback
• Check tape condition: Moldy or warped tapes degrade quality
• Use S-Video if available: It delivers sharper image than composite
Optimize Quality and Storage Efficiency
Capture at Native VHS Resolution
Stick to 640×480. VHS doesn’t support higher resolutions. Upscaling creates larger files without real quality gain. You’re preserving the original—don’t over-process.
Estimate File Sizes for Storage Planning
• 3-minute clip: ~80 MB (MP4, high quality)
• 1-hour tape: ~750 MB
• 10 tapes (10 hours): ~7.5 GB
A 1TB external drive can hold over 1,300 hours of VHS content—plan accordingly.
Choose MP4 for Maximum Compatibility
Save files in MP4 (H.264) format. It’s widely supported on phones, tablets, smart TVs, and cloud platforms. It balances quality and file size better than WMV, MOV, or AVI for everyday use.
Consider Professional Services for Irreplaceable Tapes
When to Hire a Pro
If your tapes contain irreplaceable content—weddings, funerals, rare footage—consider a professional service. They use high-end decks, perform noise reduction, and offer restoration for damaged tapes.
Compare DIY vs. Professional Costs
• DIY: Under $15 (grabber) + your time
• Professional: $10–$25 per tape
For large collections or fragile tapes, pros may be worth the cost. But for most home videos, DIY delivers excellent results.
Follow Best Practices for Long-Term Success
Maintain Your VHS Tapes
• Store tapes upright in a cool, dry place
• Avoid direct sunlight and humidity
• Play tapes occasionally to prevent sticking
Old tapes can shed oxide or warp—handle gently.
Digitize Before Tapes Degrade
VHS tapes degrade over time due to magnetic decay, mold, and mechanical wear. The sooner you digitize, the better the quality you’ll capture.
Label Files for Easy Access
Organize your digital archive:
• Use consistent naming: Event_Year.mp4
• Create folders by year or family member
• Add metadata (date, people, location) in a text file
Future you will thank you.
Frequently Asked Questions About Transferring VHS to Computer
What is the cheapest way to transfer VHS to computer?
The cheapest way is using a $15 USB 2.0 video grabber with free software like OBS Studio. You’ll need RCA cables and a working VCR, but no additional costs. This setup works on both Mac and PC and delivers high-quality digital files.
Can I transfer VHS to computer without a VCR?
No. You need a working VCR to play the tape and output the analog signal. There is no way to read VHS tapes directly with a computer. If your VCR is broken, you’ll need to buy or borrow a working one.
How long does it take to transfer a VHS tape to computer?
It takes exactly as long as the tape plays. A 2-hour tape requires 2 hours of real-time recording. There is no faster method—this is analog-to-digital conversion at 1x speed.
Why is there no sound when I transfer VHS to computer?
This usually happens when your VCR outputs mono audio but you’re not using a mono-to-stereo splitter. The audio will play in only one ear. Fix it by using a splitter or duplicating the audio track in editing software.
What file format should I save my digitized VHS videos in?
Save in MP4 (H.264) format. It’s widely compatible, plays on almost any device, and offers good quality with manageable file sizes. Avoid obsolete formats like WMV or low-compatibility ones like MOV unless required.
Can I edit the video after transferring VHS to computer?
Yes. Use free tools like DaVinci Resolve or Shotcut to trim, adjust audio, fix color, or add titles. Editing is optional—many users keep raw captures for archival and create edited versions for sharing.
Key Takeaways for Transferring VHS to Computer
The best way to transfer VHS to computer combines an affordable USB capture device, free software like OBS Studio, and a working VCR. With a few hours of setup and real-time recording, you can preserve decades of memories in digital form. Stick to 640×480 resolution, use MP4 format, and back up files in multiple locations. Start with one tape to test your setup, then scale up. Whether you’re using a $15 grabber or a premium Elgato, the process is accessible, repeatable, and rewarding. Begin digitizing today—your future self will thank you.