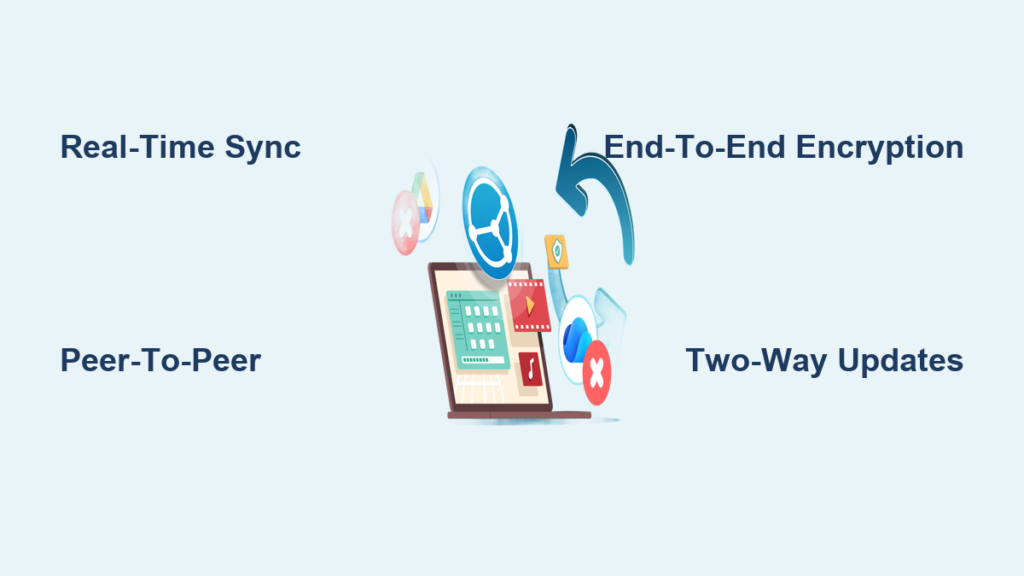
Keeping files in sync across two computers is essential for productivity—especially when switching between a desktop and laptop, collaborating with others, or managing large datasets like 8.5GB of documents or Outlook .pst files. The best way to sync folders between two computers depends on your priorities: real-time updates, two-way synchronization, security, ease of use, or avoiding cloud services entirely. Unlike OneDrive, which often hides files or moves them automatically, local sync methods give you full control.
This guide delivers proven, real-world solutions—no fluff. You’ll learn how to use Syncthing for real-time peer-to-peer syncing, FreeFileSync for visual folder comparisons, ViceVersa PRO for business-grade reliability, and built-in Windows tools like Offline Files and robocopy. Each method is tested for speed, security, and simplicity—so you can pick the best fit for your workflow, whether you’re a beginner or tech-savvy user.
Syncthing: Real-Time Peer-to-Peer Folder Sync
Syncthing is the top choice for users who want automatic, encrypted, cloud-free folder syncing between two computers.
Why Syncthing Is the Best for Real-Time Sync
- No cloud storage: Files transfer directly between devices
- Instant updates: Enable “Watch for Changes” for real-time sync
- Cross-platform: Works on Windows, macOS, Linux
- End-to-end encryption: All data encrypted in transit
- Full user control: No file hiding, no background moves
Ideal for users who value privacy, speed, and reliability—especially those frustrated with OneDrive’s behavior.
Install and Launch Syncthing on Windows
- Download from syncthing.net
- Extract ZIP to
C:\Syncthing - Right-click
syncthing.exe→ Run as Administrator - Browser opens to
http://127.0.0.1:8384
Note: Windows may block unsigned software—click “More info” → “Run anyway” and allow firewall access.
Secure the Web Interface with Login
- Go to Settings > GUI
- Set a username and strong password (12+ characters)
- Disable “Anonymous Usage Data”
- Optional: Enable HTTPS (accept self-signed certificate)
Warning: Never leave the GUI unprotected—this is your main security layer.
Rename Devices for Clear Identification
- Go to Settings > General
- Change device names to match your machines (e.g., “Office Desktop” and “Work Laptop”)
- Save changes
Clear naming prevents confusion when syncing multiple folders.
Add a Folder to Sync with Two-Way Updates
On the source computer:
- Click Folders > Add Folder
- Select folder path (e.g.,
C:\Projects) - Set a descriptive label (e.g., “Client Work”)
- Under Sharing, leave unshared
- In Advanced:
– Set Type to Send & Receive (for two-way sync)
– Check Watch for Changes
– Enable Ignore Permissions (unless ACLs are critical) - Click Save
Syncing begins once the second device is linked.
Link the Second Computer Using Device ID
On the destination machine:
- Go to Devices > Add Remote Device
- Paste the Device ID from the first machine (found under Actions > Show ID)
- Name the device (e.g., “Office Desktop”)
- Click Add
Optional: Use QR code scan if both devices are nearby.
Approve Connection and Set Destination Path
Back on the first machine:
- A prompt appears: “Work Laptop wants to access your folder”
- Click Yes, select the folder, and confirm
On the second machine:
- Prompt: “Add folder from Office Desktop?”
- Click Yes
- Choose destination path (e.g.,
C:\Projects) - Ensure folder structure matches
Sync starts immediately—no manual intervention needed.
Avoid Common Sync Failures
- Never delete
.stfolder: This hidden folder contains sync metadata - Deleting it forces a full resync—no incremental updates
- Use Send Only mode for one-way migrations
- If permission errors occur, re-enable ACL syncing after initial transfer
FreeFileSync: Visual Folder Comparison and Sync
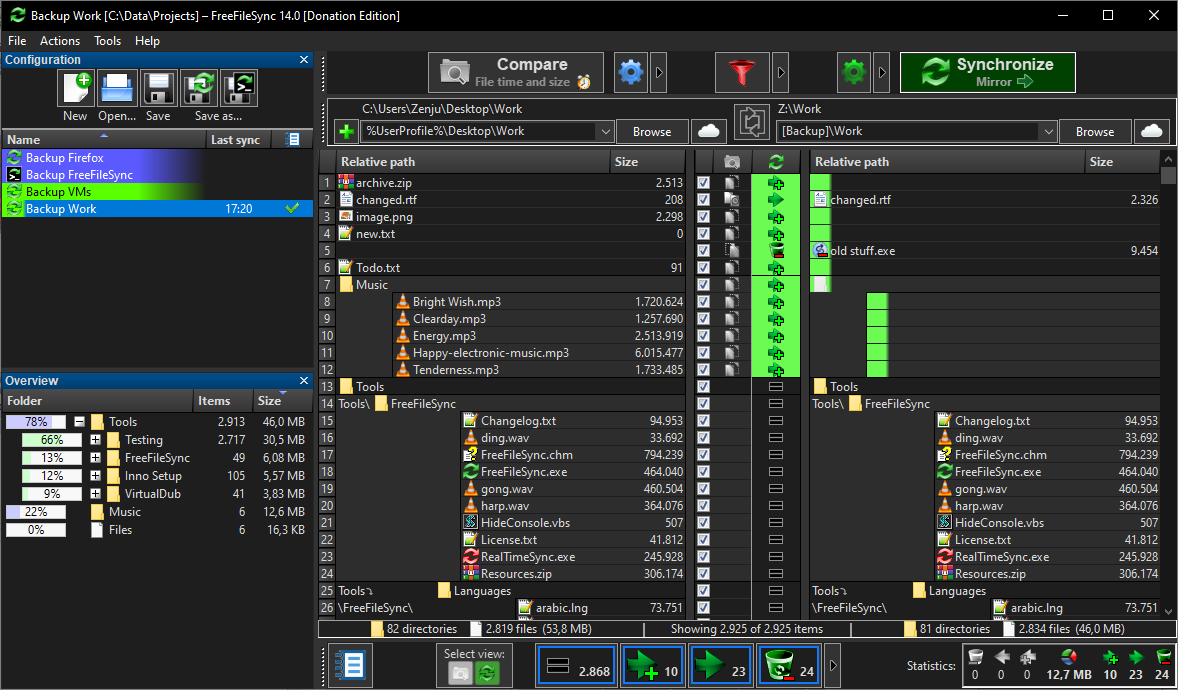
FreeFileSync gives you full visibility into file differences before syncing—perfect for manual or scheduled syncs.
Why FreeFileSync Excels for Controlled Syncing
- Free and open-source
- Visual diff display: See which files are new, modified, or deleted
- Bidirectional sync: Keep both folders updated
- Supports network paths and SFTP
Best for users who want control and clarity over automation.
Enable File Sharing and Map Network Drive
FreeFileSync doesn’t handle networking—set up access first:
- On both PCs, enable Network discovery and File and printer sharing (in Network and Sharing Center)
- Share the folder:
– Right-click → Properties → Sharing tab → Share
– Add Everyone with Read/Write access - Map a network drive:
– Open This PC → Map network drive
– Enter path like\\Desktop-PC\Projects
– Check “Remember my credentials”
Now both machines can access each other’s folders.
Create a Two-Way Sync Job in FreeFileSync
- Open FreeFileSync
- Set Left side to local folder (e.g.,
C:\Projects) - Set Right side to mapped drive (e.g.,
Z:\Projects) - Click Compare
- Choose sync method:
– Synchronize: Two-way updates
– Mirror: One-way overwrite - Click Synchronize to run
Only changed files are copied—fast and efficient.
Schedule Automatic Syncs with Task Scheduler
- Click Batch Mode in FreeFileSync
- Save job as
Sync_Projects.ffs_batch - Open Task Scheduler
- Create task:
– Trigger: Daily or hourly
– Action: Start program →FreeFileSync.exewith job file as argument - Run with highest privileges
Sync runs silently in the background.
Use SFTP for Encrypted Folder Sync
Instead of SMB, use SFTP for security:
- On one PC, install OpenSSH Server:
– Settings → Apps → Optional Features → Add OpenSSH Server - Note the PC’s IP address
- In FreeFileSync, click Cloud button
- Add SFTP connection:
– Host:192.168.1.100
– Port:22
– Username: Your Windows username
– Password: Your login password - Use SFTP path as sync target
SFTP encrypts transfers—ideal for sensitive data.
ViceVersa PRO: Reliable Two-Way Sync for Business Use

ViceVersa PRO is a powerful commercial tool for users needing scheduled or real-time sync—especially with Outlook .pst files.
Why ViceVersa PRO Is Best for .pst and Business Files
- GUI-based two-way sync
- Supports .pst, databases, and locked files
- Scheduling and versioning
- Runs as Windows service (with VVEngine)
Ideal for sales teams, offices, or anyone needing robust sync without complexity.
Set Up Two-Way Sync Over Network
- Install ViceVersa PRO on both computers
- Create a new Profile
- Set Source Folder:
C:\Data(on first PC) - Set Destination Folder:
\\SecondPC\Data - Choose Synchronization method
- Click Run to test
Changes sync both ways automatically.
Schedule Syncs to Run Automatically
- Open VVScheduler
- Add profile to schedule
- Set frequency: Every 5 minutes, hourly, daily
- Run even if user is logged out
Sync runs silently in the background.
Enable Real-Time Sync with VVEngine
For instant updates:
- Install VVEngine on both machines
- VVEngine runs as a service and monitors folders
- Enable File Change Notification in profile
- Sync triggers immediately when files change
Note: VVEngine must be installed locally—cannot monitor remote folders.
Windows Built-In Sync: No Third-Party Software Needed
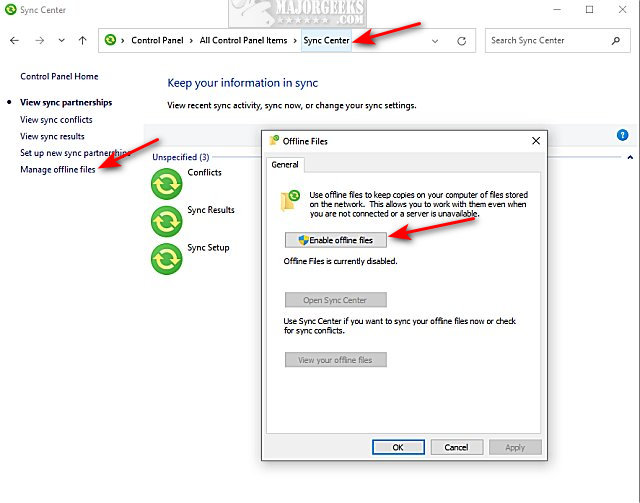
Use Windows’ native tools to sync folders without installing anything.
Enable Offline Files and Sync Center
- Open Control Panel → Sync Center
- Click Manage offline files
- Click Enable offline files → OK
- Restart if prompted
Share Folder on Second Computer
- Right-click folder → Properties → Sharing tab
- Click Share → Add Everyone → Set to Read/Write
- Note the network path (e.g.,
\\LAPTOP\Data)
Map and Make Folder Available Offline
On the first computer:
- Open This PC → Map network drive
- Choose letter (e.g., Z:)
- Enter path:
\\LAPTOP\Data - Check Reconnect at sign-in and Connect using different credentials
- Enter second PC’s username and password
- Click Finish
- Right-click mapped drive → Always available offline
Set Automatic Sync Schedule
- Open Sync Center
- Click Set up new sync partnerships
- Browse to mapped drive (Z:)
- Select folder → Enable offline files
- Choose Always available offline
- Set sync schedule (e.g., every 10 minutes)
Now files sync automatically—even when the second PC is off.
Robocopy: One-Way Folder Sync via Command Line
Robocopy is a built-in Windows tool for powerful, scriptable one-way folder synchronization.