Connecting a MIDI keyboard to your computer unlocks music production, virtual instruments, and live performance control. The best way to connect a MIDI keyboard to a computer is usually a direct USB connection—simple, reliable, and plug-and-play for most modern controllers. This method sends MIDI data and powers the device over one cable, making it ideal for beginners and professionals alike.
But if you’re using a synth with built-in sounds, a vintage keyboard, or need ultra-low latency, other methods like audio interfaces, MIDI-to-USB adapters, or wireless systems may be better. This guide covers every connection type, step-by-step setup, DAW configuration, and expert tips to avoid common pitfalls like dropped notes, latency, or iOS power issues.
USB Direct Connection for Modern Controllers

Plug-and-Play Setup with USB Cable
If your MIDI keyboard has a USB port labeled “USB to Host,” you can connect it directly to your computer using a standard USB cable. This is the best and fastest way to connect a MIDI keyboard to a computer for most users—especially with modern controllers from brands like Akai, Novation, or Arturia.
The USB connection transmits MIDI data and power, eliminating the need for external power supplies or audio interfaces in basic setups. Most devices are class-compliant, meaning they work on Windows, Mac, and iOS without installing drivers.
How to Connect via USB in 5 Steps
- Use the correct USB cable – USB-B to USB-A (most common) or USB-C if supported
- Plug into the keyboard and computer – Ensure a secure connection
- Wait for device recognition – On Mac, check Audio MIDI Setup; on PC, check Device Manager
- Open your DAW – Enable the device in MIDI settings (e.g., Input: “USB MIDI Cable”)
- Create a MIDI track – Set input to your keyboard, arm for recording, and play
“I was skeptical about plugging straight into the PC via USB, but it’s kinda nice not having to go through my audio interface.” — Craig Fowler, producer
When USB Is the Best Option
- Modern MIDI controllers without built-in sounds
- Home studios with minimal gear
- Quick songwriting or practice sessions
- Class-compliant devices (no driver installation needed)
Driver Installation for Older or High-End Models
While most devices are plug-and-play, some older or premium models require manufacturer-specific drivers. If your keyboard isn’t detected:
– Download drivers from the official website
– Reboot after installation
– Avoid third-party or pirated sources
Audio Interface with MIDI I/O for Synths and Studios
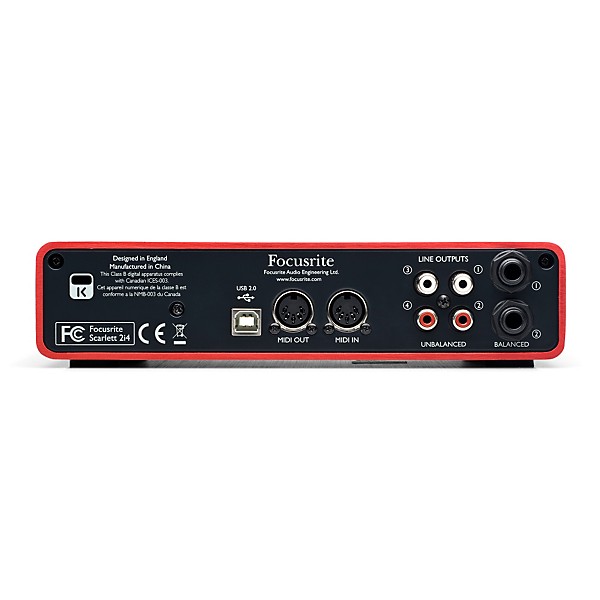
Professional-Grade Connection for Real Audio Recording
If your keyboard is a synth with built-in sounds (like a Roland JUNO or Korg Minilogue), the best way to connect a MIDI keyboard to a computer is through an audio interface with MIDI In/Out ports. This setup allows two-way MIDI communication and, crucially, lets you record the actual audio output of the synth.
Even if your synth has USB, using an audio interface ensures lower latency, better stability, and compatibility with vocals, guitars, and other instruments.
Why Use an Audio Interface?
- Records real synth tones (MIDI data has no sound)
- Supports legacy 5-pin DIN gear
- Enables computer-to-synth control (e.g., DAW plays your hardware)
- More reliable than cheap USB adapters
- Already owned by most home studios
Recommended Audio Interfaces
- Focusrite AudioBox USB 96 – Affordable, includes MIDI I/O
- PreSonus AudioBox series – Reliable, widely used
- Universal Audio, Apogee, MOTU – Premium options with ultra-low latency
Correct MIDI Signal Flow
Ensure proper connections:
– MIDI Out (keyboard) → MIDI In (interface)
– MIDI Out (interface) → MIDI In (keyboard)
⚠️ Never connect Out to Out – This breaks the signal chain.
How to Record the Actual Synth Sound
- Use 1/4″ cables from the synth’s L/R outputs
- Connect to Inputs 1 & 2 on the interface
- Create an audio track in your DAW
- Set input to match interface channels
- Arm and record while playing
💡 Pro Tip: Keep the MIDI track until final mix—lets you re-record audio if you change sounds or arrangements.
MIDI-to-USB Adapter Cables for Vintage Keyboards

Connect 5-Pin DIN Keyboards to USB
If your keyboard only has 5-pin DIN MIDI ports, you’ll need a MIDI-to-USB adapter. These small devices convert the classic MIDI signal to USB for computer use.
But not all adapters are equal—cheap ones cause dropped notes, stuck keys, and disconnections.
Avoid Sub-$10 Adapters
- Black plastic bodies with rounded corners
- Often branded with a staff/clef symbol
- Known for poor build quality and data loss
- Frequently fail under sustained use
Choose Quality Adapters (~$15+)
- Clear casing with LED activity lights
- Reputable brands: CME, M-Audio, Roland
- “Solid as a rock for years” — verified by users
“The under $10 ones are terrible. The $15 ones with lights? Perfect. I know from bitter experience.” — Starship Krupa
Setup Steps for MIDI-to-USB
- MIDI Out (keyboard) → MIDI In (adapter)
- USB end → computer
- Check device recognition in DAW
- Create MIDI track and arm for recording
When to Use This Method
- No audio interface with MIDI I/O
- Connecting vintage synths (1982+)
- Budget setups
- Single-device use
Wireless MIDI for Stage and Mobile Use
Bluetooth and Proprietary Wireless Systems
For live performance or cable-free studios, wireless MIDI is a growing option. Two types: Bluetooth LE MIDI and proprietary RF systems.
Bluetooth LE MIDI
- Works with recent Macs, PCs, iPads, Android
- Uses UMP (Universal MIDI Packet) protocol
- No drivers needed on modern systems
- Search Amazon: “bluetooth midi”
- CME is the most reliable brand
Setup:
- Enable Bluetooth on your device
- Put MIDI device in pairing mode
- Connect via system settings
- Enable in DAW under UMP devices
Proprietary Wireless (e.g., Lekato)
- Uses 2.4 GHz RF, not Bluetooth
- Rechargeable lithium battery
- Has MIDI In and Out ports
- Used for fully wireless stage setups
“I use a Lekato wireless MIDI connector with my Casio PX5S. No cables, runs on battery, works flawlessly.” — Starise27
Considerations
- Latency may be higher than wired
- Battery management required
- Signal interference in crowded RF environments
- Best for live performance, not critical recording
Connecting MIDI Keyboards to iPad or iPhone
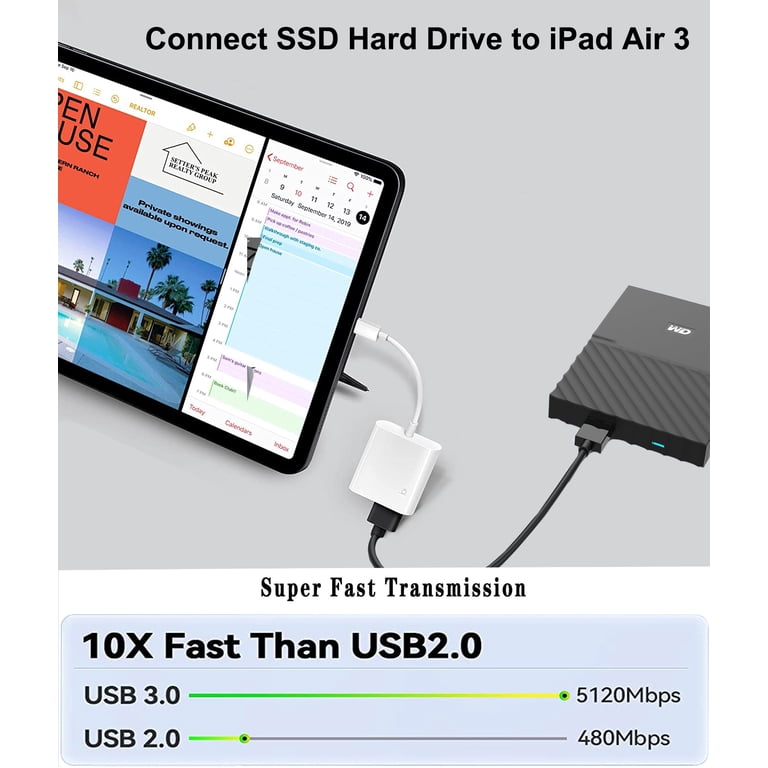
iOS Setup Requires Powered Adapter
To connect a MIDI keyboard to an iPad or iPhone, you need:
1. A powered Lightning-to-USB Camera Adapter
2. A class-compliant MIDI keyboard
Why Powered?
iPads and iPhones don’t provide enough power for most MIDI keyboards. The adapter must be plugged into a power source—otherwise, the keyboard won’t turn on or will disconnect.
Setup Steps
- Plug powered adapter into wall charger
- Connect MIDI keyboard to adapter via USB
- Plug adapter into iOS device
- Open a music app (GarageBand, Cubasis, etc.)
- Test keyboard response
Compatibility Check
- Class-compliant only – No downloadable drivers
- Not all keyboards support iOS
- Check manufacturer specs before buying
DAW Configuration for MIDI Input
Make Your Keyboard Work in Any DAW
No matter how you connect, your DAW must recognize the MIDI input.
General Setup (All DAWs)
- Open Preferences > MIDI Devices
- Enable your keyboard under Input and Output
- Create a new MIDI track
- Set Input to your device
- Select MIDI Omni to receive all channels
- Arm the track (click red record button)
Cakewalk by BandLab Example
- Go to Edit > Preferences > MIDI Devices
- Enable device (e.g., “USB MIDI Cable”)
- Insert MIDI track → Set input → Arm
Troubleshooting: Device Not Showing?
- Mac: Open Audio MIDI Setup – check for device
- PC: Open Device Manager – look under Sound, video and game controllers
- iOS: Ensure keyboard is class-compliant and adapter is powered
Recording Audio from Hardware Synths
MIDI Data Is Not Audio
MIDI data contains notes and timing—but no sound. To hear your synth in the final mix, you must record its audio output.
Step-by-Step Audio Recording
- Connect L/R outputs of synth to interface inputs
- Create new audio track in DAW
- Set input to match interface channels (e.g., Input 1+2)
- Arm and record while playing MIDI
- Mute the MIDI track after recording to prevent echo
Best Practice: Record Audio Last
- Keep MIDI tracks during production – allows editing
- Record audio just before final mix
- Lets you change sounds, tempo, or arrangement freely
Connecting Legacy Keyboards (1982+)
Vintage Gear Made Simple
Most keyboards made after 1982 have MIDI ports. To connect:
1. Use a 5-pin MIDI cable from MIDI Out (keyboard) to MIDI In (interface)
2. Connect interface to computer via USB
3. Power on keyboard (set to MIDI mode, usually default)
4. Enable device in DAW
Pre-1982 Keyboards?
- No MIDI ports
- Require a MIDI retrofit or conversion box
- Rare and expensive – consult a technician
Troubleshooting Common Issues
Keyboard Not Detected?
- Check Device Manager (PC) or Audio MIDI Setup (Mac)
- Install drivers if needed
- Try a different USB cable or port
- Restart computer
Dropped or Stuck Notes?
- Cheap MIDI-to-USB adapter – Replace with quality model
- Loose cable – Reseat all connections
- USB hub overload – Plug directly into computer
Echo or Double Sound?
- You’re playing MIDI and audio simultaneously
- Mute the MIDI track after recording audio
The Rockband Keytar Issue (Rare)
- This guitar-shaped MIDI controller requires a diode drop to activate MIDI mode
- Without it, it stays in wireless mode
- Fix: Solder a diode across the MIDI input circuit
Latency Testing & Optimization
Measure Your Response Time
High latency means delay between key press and sound. Test it:
- Place mic 1″ from a key
- Record audio and MIDI simultaneously
- Zoom in – measure gap between audio transient and MIDI note
- Goal: Under 10ms
Reduce Latency
- Lower buffer size in DAW (128 or 256 samples)
- Use ASIO (Windows) or Core Audio (Mac)
- Close background apps
- Use audio interface with dedicated drivers
Connecting Multiple MIDI Devices
Stack Controllers and Synths
You can connect multiple MIDI devices at once:
– Keyboard + foot controller
– Drum pad + synth
– Multiple synths in a chain
Options:
- Audio interface with MIDI I/O – Most reliable
- Multi-port MIDI interface (e.g., Midiman Midisport 8×8) – Rare but powerful
- Powered USB hub with multiple adapters – Possible, but test stability
Frequently Asked Questions About Connecting MIDI Keyboards
Can I connect a MIDI keyboard directly to a computer with USB?
Yes. Most modern MIDI keyboards connect directly via USB. Use a standard USB-B or USB-C cable. The connection sends MIDI data and powers the device. Ensure your keyboard is class-compliant for plug-and-play use.
Why isn’t my MIDI keyboard showing up on my computer?
Check Device Manager (PC) or Audio MIDI Setup (Mac). Install drivers if needed. Try a different USB cable or port. For iOS, ensure the keyboard is class-compliant and the adapter is powered.
Do I need an audio interface to use a MIDI keyboard?
Not for MIDI control. But if your keyboard has built-in sounds and you want to record its audio, you need an audio interface with MIDI I/O and audio inputs.
What’s the best MIDI-to-USB adapter?
Choose a $15+ model with LED activity lights and a clear casing. Avoid under-$10 black adapters—they often cause dropped notes. Reputable brands include CME, M-Audio, and Roland.
Can I use Bluetooth to connect a MIDI keyboard?
Yes. Bluetooth LE MIDI works with recent computers, tablets, and phones. Use UMP mode in your DAW. CME makes reliable Bluetooth MIDI adapters.
How do I record audio from a hardware synth?
Connect the synth’s L/R outputs to an audio interface with 1/4″ cables. Create an audio track in your DAW, set input to the interface channels, arm, and record. Mute the MIDI track afterward to prevent echo.
Best Practices for Connecting Your MIDI Keyboard
Choose the Right Method
| Scenario | Best Connection |
|---|---|
| Modern MIDI controller | USB Direct |
| Synth with built-in sounds | Audio Interface + Audio Cables |
| Legacy keyboard (5-pin DIN) | Audio Interface or Quality MIDI-to-USB |
| iPad/iPhone use | Powered Adapter + Class-Compliant Keyboard |
| Live stage | Wireless MIDI (Bluetooth or Lekato) |
| Multiple devices | Audio Interface with MIDI I/O |
Critical Do’s and Don’ts
✅ Do:
– Use class-compliant devices for iOS
– Record synth audio before final mix
– Test latency with mic method
– Buy quality MIDI-to-USB adapters (~$15+)
❌ Don’t:
– Use sub-$10 MIDI adapters
– Connect MIDI Out to Out
– Forget to mute MIDI track after audio recording
– Assume all keyboards work with iPad
Final Recommendation
For most users, the best way to connect a MIDI keyboard to a computer is:
– USB direct for controllers
– Audio interface for synths (to record audio)
– Quality MIDI-to-USB for legacy gear
– Wireless for stage freedom
Invest in reliable cables and interfaces, and always verify DAW recognition. With the right setup, your MIDI keyboard will be a seamless extension of your digital studio.